Screenplay
Creating a new Screenplay
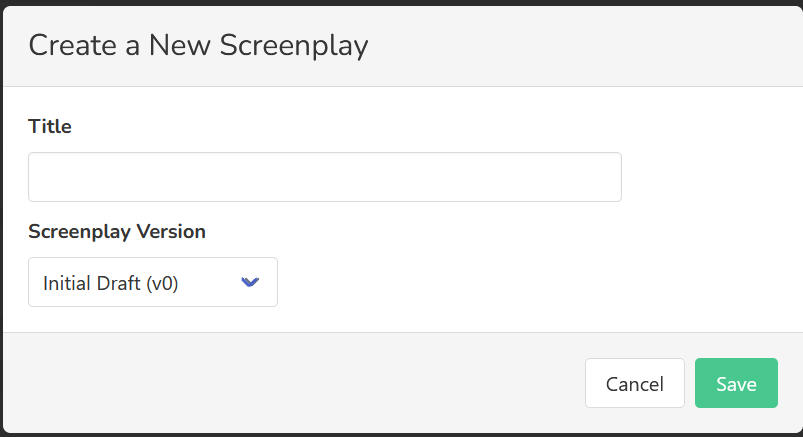
Click the + icon on the screenplay bar to create a new screenplay. Once clicked you will be presented with a form to fill the details.
- Title: This is the name of the screenplay and it is a mandatory field.
- Screenplay Version: By default it has Initial Draft (v0) selected. You can select any of the options presented

Both the fields can be changed anytime later. After you enter/select the details click the save button. You will be redirected to the specific project dashboard and the newly created screenplay will be listed.
Populating a Screenplay
Clicking a screenplay tile/card will take you into the screenplay to be populated with Scenes and Elements within Scenes.
Adding a Scene
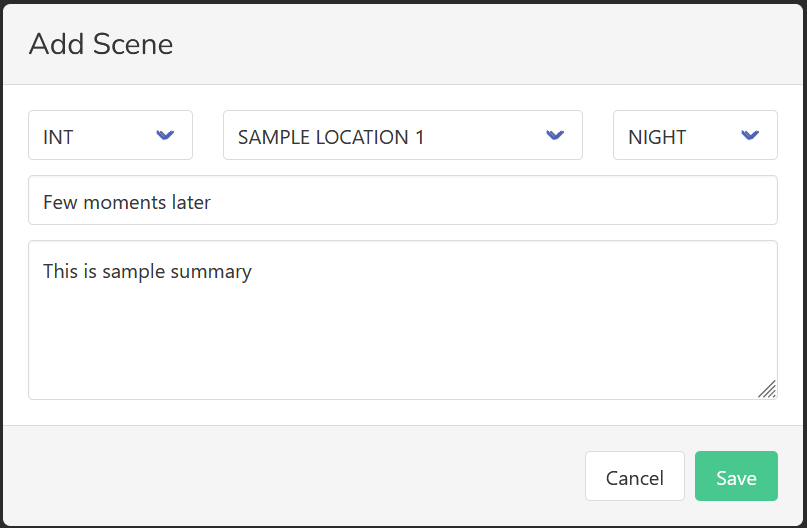
Initially there won't be any scenes. To begin with click the Add Scene button on the top left corner. This presents you with a form to be filled with the scene details.
- INT/EXT dropdown: Choose if the scene is taking place indoor or outdoor. If this doesn't apply, choose other.
- Location dropdown: You can select a location that you have already added to the project. If instead you want a brand new location you can select the '+ New Location' option and proceed to add it by just specifying the name.
- Daypart dropdown: Choose the time of the day the scene takes place. You can choose other if none of the options listed apply
- Notes: In case you need to add any other thing that should appear n the scene heading, you can add it in this field
- Summary: Enter a brief summary of what takes place in the scene. This will be helpful to quickly identify the scenes. Though this field is optional, it is highly recommended that you enter a summary. It will be very useful when you rearrange scenes.
If you don't specify a location or you deleted a location which was assigned to the scene, then the location will be displayed as "Unknown Location" in the scene title.

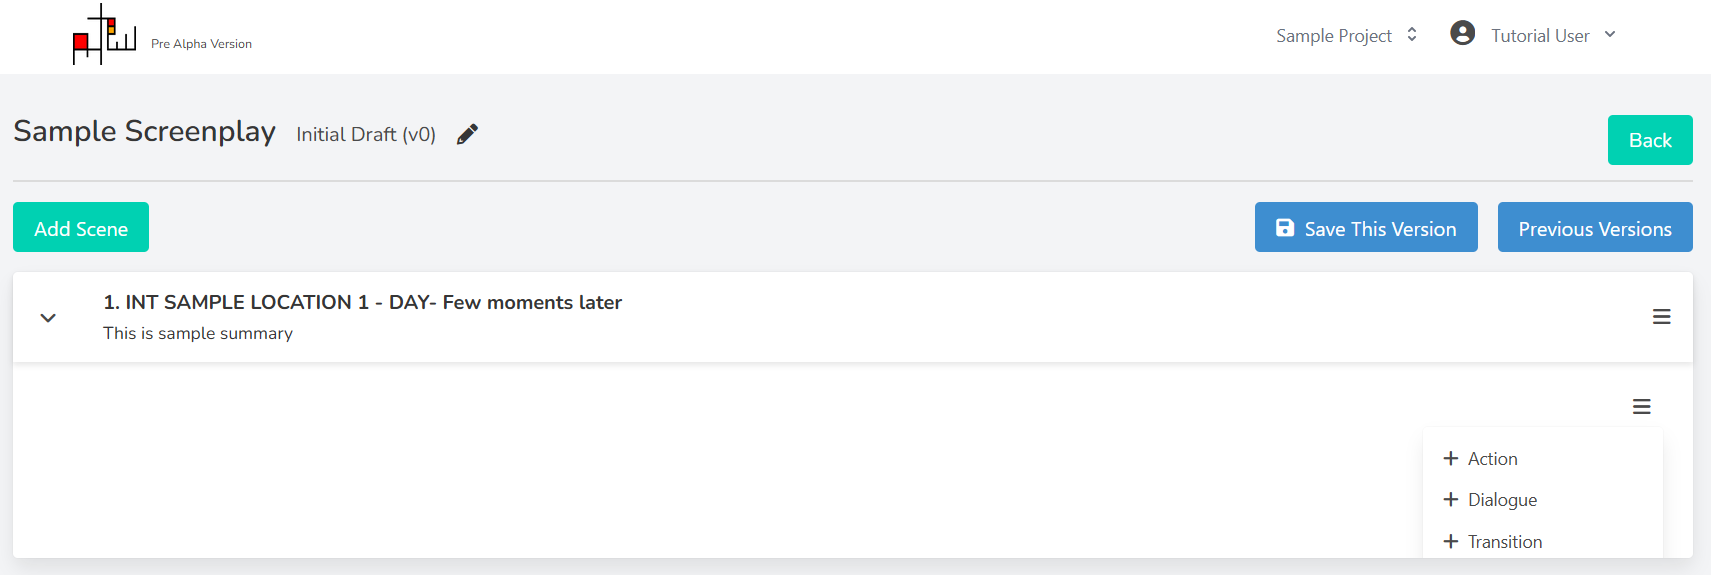
After you enter the details a scene banner is populated in the Screenplay. This banner collapses/expands when you click on it. All these details can be changed by clicking the menu icon on the right hand side and clicking the 'Edit Scene' option.
The number you see at the beginning of the scene heading is the scene number and it is autogenerated. This number changes when you change the scene order.
We have intentionally kept the structure of a Screenplay simple. Structure is thus...
- Screenplay comprises several scenes
- Each scene has several elements
- Elements can be one of Action, Dialogue or Transition
This simple structure helps later in managing the project. Parantheticals, extensions and any other additional elements can easily be incorporated within the above three in either the content or notes sections.
Adding Elements
In a newly added scene there is only one menu icon (three bars) on the right hand side. Clicking this will give you the option to add any one of the elements.

If there are already elements present, you can insert a new one anywhere. For example you want to insert a dialogue between two action elements - let's call them Action 1 and Action 2. You can click the menu (three bars) icon of Action 1 and add a dialogue. The new dialogue will be inserted below Action 1 and above Action 2.
Adding Action or Transition
Selecting either action of transition will present you with a single input box (occuping the whole space for action and right aligned for transition) You can enter your text in this and click the save button
THIS ONLY WORKS IN GOOGLE CHROME BROWSER
Content of Action and Dialogue can be dictated. This is especially helpful when dealing with Indian languages, typing for which is quite cumbersome. Select the language in which you want to dictate, click and hold the "Press and Hold" button and speak. After you've finished release the button and you should have your content in the box.
Adding Dialogue
When adding a dialouge you are presented with a form to be filled.
- Character: Select a character that is already present in the project. If you want to add a new character you can do so by selecting the '+ New Character' option and proceed by just entering the name of the character.
- Notes: Any additional things that should appear next to the character name should be mentioned here. Such as V.O
- Dialogue Text: This is where you can type or dictate the dialogue.
Click save after finishing and the dialouge is added to the scene.

The dialogue card shows several things to be visually distinct for the reader.
- Avatar: For characters without a custom image the default avatar is shown.
- Character Name: Below the avatar the character name is shown in all caps.
- Notes: and below the character name appear the notes in this case V.O.
- Content: The spoken dialogue appears
If you don't specify a character or you deleted a charcter which was assigned to the dialogue, then the character will be displayed as "Unknown Character" in the dialogue card.
A customized character will result in the dialogue card being displayed even more distinctly. Below is an example. Character customization is covered in the Character section.

Saving / Backup of Screenplay
You can take a backup of your screenplay by clicking the 'Save This Version' button on top. You are presented with the option to provide a brief description for the backup. This description will be useful in differentiating between several copies of the screenplay.
This saves a snapshot of the screenplay in its raw format.
Restoring a Backup
Always take a backup of the latest version of the screenplay before restoring a previous version. You even get a warning before you proceed so that you don't lose unsaved work. To know why this is important, check the 'What happens when you restore a backup?' section below.
The previous versions button on top right corner will take you to the page where all the backups are displayed.

To restore a version click the corresponding View button. You are shown the screenplay in the state that it was saved. Note that there are no burger menu icons next to scenes and elements to make changes. This is because it is currently in read-only mode. After you are sure that this is the version you want to restore, click the 'Restore This Version' button on top. Now you have the restored version live for you to make changes.
What happens when you restore a backup?
Let's say we have two versions of a screenplay as illustrated below.

Let's say version 2 is live right now. When we restore Version 1, the following take place
- The changes done in Action 1 are erased and the old text is restored
- The changes done in Dialogue 1 are erased and the previous dialogue is restored
- Action 3 is deleted
- Action 2 is reinstated.
As long as there is a backup we can restore any changes done. However at the time of restoring any unsaved work is lost. So, be cautious when restoring old versions of a screenplay. Always take a backup before restoring an old version. You can take as many backups as you want.
In the case of deleted characters and locations being present in the version being restored, such characters are reinstated. But missing characters in the version being restored are not deleted from the project.